




200th Post With Strawberry Ice-Cream

Author: Siddhi Shirsat // Category: ,
Hey its my 200th post:-)) ...i am very delighted and bit shocked also that so soon i reached my 200th post...indeed its a achievement for me...I had started this blog just for fun and storage purpose initially, but later when i got many new blogger friends i got very much interested in it and cause of you all my dear friends i am able to reach this milestone...ur sweet and inspiring comments encouraged me more to prepare and post many interesting recipes here...Now this blog is become a important part for me and and u all are like a big family to me...thank you all my dear friends so visiting my blog and commenting....

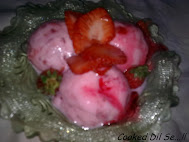
Since its my 200th post i wanted to post a sweet dessert recipe and what can be better than a home made strawberry ice cream... i had prepared this some days back as i had loads of strawberries and it came out very well, soft and yummy...I have not used any gelatin in it so its a vegetarian version, but still it was very soft and tasty too...I had also added chopped strawberry pieces which enhanced its taste..we all enjoyed it a lot...but u require little more patience to make it soft.

HAPPY HOLI 2 ALL OF YOU...NJOY IT A LOT...!!!


INGREDIENTS:
  • 500 ml semi skimmed milk
  • 1 cup condensed milk
  • 2-3 table spoons milk powder
  • 1 cup fresh strawberry puree( or strawberry crush)
  • 1/2-3/4 cup sugar
  • 1 1/2 cup chopped strawberry pieces
  • 2 tea spoons of corn flour

METHOD:

Take 1/2 cup milk in a bowl and add milk powder and corn flour and stir it well.Boil the remaining milk in a non stick pan.When the milk starts boiling add the corn flour and milk powder mixed milk and stir it countinously on low flame, do not allow any lumps to form.

Stir it countinously and let it simmer on low flame till the mixture thickens and coats on the spoon.Remove it from flame and let it cool.

Now when its cooled add the sugar,strawberry puree and condensed milk and blend it for 1-2 mins till it forms a smooth mixture.Pour it in a container and freeze till firm.

When its set after some hours remove it and blend it again for 1-2 mins till it melts fully and again freeze it for 5-6 hours.Agian blend it and mix the chopped strawberry pieces in it and let it set for 7-8 hours or till it gets firm.

This blending and setting of ice cream is done again and again to make it soft...when the ice cream sets for the first time and u blend it the small ice crystals formed are broken and next time when u set it less ice crystals r formed which u break again in second time blending so ice cream becomes more soft.

After final setting of 7-8 hours ice cream will be ready to serve.Scoop it and drizzle some strawberry crush and serve.


Cheesy Corn Chilli Poppers...!!!

Author: Siddhi Shirsat // Category: ,

This is a very tasty and quick starter recipe...its long green peppers stuffed with cheese and sweet corns with seasonings.I have used bhavnagri chillis here which are less spicy and thick. You can use any long green peppers which are less spicy.I have used both mozerella as well as processed cheese for the stuffing which gives it a very nice taste.


INGREDIENTS:

5-6 long green chillis( bhavnagri)
2 cups sweet corn kernels
1 cup grated mozerella cheese
1 cup grated processed cheese
2 tea spoons chilli flakes
1 tea spoon pepper powder
1/2 cup maida(all purpose flour)
1 cup bread crumbs
oil
salt

METHOD:

Cut each green chilli into 1 inch pieces and remove it seeds so that each piece is like a ring.Now apply salt to it and keep aside.Blanch sweet corn kernels in hot boiling water and let them cool.Chop sweet corn kernels to small pieces.

Now take the chopped sweet corn kernels in a bowl and add grated processed and mozerella cheese,chilli flakes,pepper powder and salt.mix it well.

Now stuff this mixture in the chopped chilli rings and pack it on both sides with it.Make a medium thick batter of flour and water with little salt.Dip the stuffed chilli rings in it fully and then roll it in bread crumbs and deep fry them in hot oil till golden brown and crisp.Keep the flame medium so that they get cooked from inside also.

Serve hot with tomato ketchup.


Preparation Time: 20 mins

Repost for St Valentines Event...!!!

Author: Siddhi Shirsat // Category:

Priya of Priya's easy and tasty recipes has organised the event St valentines Day Event and i have reposting my heart shaped beet root burfi for it.


Rasgullas...!!!

Author: Siddhi Shirsat // Category: ,

I am a fan of bengali mithais which dominate the indian mithai market as they are very famous all over india,especially Ras Malai which i like a lot and i had posted it earlier here. So how can i skip posting one of the most important bengali mithai rasgulla.If its possible for me,I always prefer to make sweets at home rather then getting them from store, as home made sweets are always pure as campared to store brought for eg in some sweet stores they mix in lot of flour with the rasgulla paneer to get more quantity of them which reduces its real taste and home made sweets are also more tasty as they contain lot of love too:-)These rasgullas are very easy to prepare, i have made them often and they have never turned a failure:-)...Recently i had made them for my younger cousin as he loves them a lot so i am posting them now.

INGREDIENTS:
  • 1 litre whole milk
  • 2 table spoons of lemon juice/vinegar
  • 2 cups sugar
  • 5 cups water
  • 3-4 tea spoons maida(optional)
  • 1 tea spoon cardamom powder
  • 1 tea spoon rose essence

METHOD:

Heat milk in a heavy bottomed pan. When it starts boiling add vinegar or lemon juice. Mix with a spoon and cook for a few minutes till the milk separates.Stir slowly and gently until white curd forms on the surface and separates from whey.

On straining this , the curd that is obtained is called "chenna".Strain thw water using a muslin cloth.Wash chenna well under cold running water and twist the cloth that was used for straining to extract water.Make a bundle of chenna with the cloth and hang it for 1-2 hours so that all the extra water in it sips down. Now the paneer/chenna is ready.

Take it on a plate and knead it very well to remove any chunks for atlest 5-6 mins. This is very important to get good quality rasgullas.If if find the kneded chenna difficult to make balls add he maida in it and kned it well to form a soft and firm dough.Maida is added so that the balls bind well and do not become loose.If you want you can skip adding maida but it will be bit difficult to make firm balls.

Now take little chenna in hand and make small ball rolling it with hand.similarly repeat this with remaining chenna.Remember when they are cooked, they increase in volume i.e they almost double, so don’t make them too big. It is quite difficult to make these as they break very easily. So apply a bit of pressure to hold them together. Try to give them as smooth surface as possible.Below i have put a pic of raw rolled chenna balls before cooking them.


In a big vessel, heat sugar and water.Remember they increase in size by 2-3 times, so make sure to use big enough vessel to hold them easily.When the sugar is dissolved and syrup comes to boil, slowly add the balls.Keep the flame very high , because of this high flame the balls do not break while cooking.

Partially close the lid and cook them for 20-25 mins on high flame.After every 5 mins spinkle 1 table spoon of cold water on the cooking mixture, because of this the rasgullas puff up very well.I had got this tip from a bong itself:-). They are done when they have almost doubled in size.Take one rasgulla out and slightly apply pressure, if it comes back to original shape, it is cooked.

Add the cardamom powder and rose essence and take off the heat. Serve them after some time.

NOTE: Always try to use fresh milk for rasgullas or else the rasgullas leave lot of oily drops(as fat separates ) in the cooking sugar syrup.

Preparation Time: 50 mins

Veg Pizza With Mexican Ranchero Sauce...!!!

Author: Siddhi Shirsat // Category: , ,

Some days back i was in mood to make pizza with some spicy sauce so thought of using mexican ranchero sauce which i had liked once and the pizza turned out very tasty.There are many slight variations of ranchero sauce but i like this recipe.The smoky flavour of ranchelo sauce gave it a very nice and unique taste.As usual i also used fried garlic, italian herbs and chilli flakes in the pizza base dough and which also contributed in enhancing its taste and flavour.It was a thin crust pizza.


INGREDIENTS:

For Pizza Crust:

I used same base which i had used for bechamel sauce mushroom pizza


For Ranchero Sauce:
  • 2-3 ripe tomatoes
  • 7-8 long red chillis(less spicy ones)
  • 1 table spoon chopped garlic
  • 2 tea spoons worcestershire sauce
  • 1 tea spoon demerara sugar ( brown sugar)
  • salt

For Pizza Topping:
  • 1-2 cups grated mozerella cheese
  • 1/2 cup sliced mushrooms
  • 3/4 cup sliced bellpeppers(yellow,red and green)
  • 3/4 cup babycorns
  • 1/4 cup sliced onion
  • 1 table spoon sundried tomatoes
  • mixed italian herbs
  • chilli flakes
  • salt
  • olive oil

METHOD:

For ranchero sauce first dry roast the tomatoes in pan for 10-12 mins till you get a smoky smell and few black burnt spots on them.Keep stirring them while roasting, then remove them and similarly dry roast red chillis for 5-6 mins till they get little black spots.

Cool the tomatoes and peel them, remove their seeds and blend them with roasted red chillis,brown sugar,garlic,worcestershire sauce and salt to get a smooth sauce.No need to add water.Ranchelo sauce is ready.You can store this for up to 15 days in refrigerator.

Now for pizza make the pizza dough ready as given here.Make ball and roll it into a pizza base of 4-5 mm thick.Grease the pizza pan and put it in it.With a folk prick the base at some places.

Drizzle 2-3 tea spoon of olive oil on it and spread it.Then apply generous amount of ranchero sauce.Arrange the topping.Sprinkle little salt,italian herbs and chilli flakes .finally sprinkle the grated mozerella cheese on it.

Bake it at 220 degrees for 20-25 mins or till the edges turn golden brown.Sprnkle little seasoning and serve hot.

Roasted Chicken With Creamy Mushroom Sauce & Buttered Rice...!!!

Author: Siddhi Shirsat // Category: , ,

This roasted chicken with creamy mushroom sauce and buttered rice really sounds a very yummy and tasty meal, infact its really a tongue tingling combo.The mushroom sauce on its own is a very creamy and wonderful side dish.Serving this sauce with roasted chicken and buttered rice is a awesome treat.I had loved this combo the very first time i had made it, so now whenever i want to make something with chicken and mushroom this is the first meal which comes to my mind.Try this tasty com bo and i am sure you will love it.

INGREDIENTS:

For Roasted Chicken:
  • 250 grams boneless chicken pieces
  • 2 table spoon of ginger garlic paste
  • 1-2 tea spoon black pepper powder
  • butter
  • salt

For Mushroom Sauce
  • 2 cups finely chopped mushrooms
  • 1 cup finely chopped onion
  • 1 table spoon finely chopped garlic
  • 2 tea spoons celery steams chopped(optional)
  • 1/2 -3/4 cup low fat fresh cream
  • 1/2 tea spoon pepper powder
  • 1/4 tea spoon nutmeg powder
  • 1 table spoon butter
  • salt

For Buttered Rice:
  • 1 cup basmati rice
  • 1-2 table spoon of butter
  • 1 tea spoon dry parley
  • salt

METHOD:

First to make the roasted chicken take the boneless chicken pieces and apply ginger-garlic paste to them and keep for 20 mins then apply salt and pepper powder.Heat a pan and add butter, shallow fry this marinated chicken pieces in it till it turns golden brown on all sides.you can even roast the chicken pieces in oven.

Now for mushroom sauce heat a vessel and add butter then add chopped onion and saute it for 2-3 mins.Add chopped garlic and saute for more couple of mins.Now add the chopped celery stems and chopped mushrooms and mix well.

Saute this mixture for 2 mins and add pepper powder and salt, saute for more 2 mins and add 2 cups of water and stir.Now add the cream and keep on low flame and cook for 2 mins.Add more water if required.Add nutmeg powder and stir.Cook on low flame till the the water reduces a little and sauce gets the required consistency.Then remove from flame.

Now finally to make the buttered rice. Cook the rice with 3 n 1/2 cups of water till 3/4 done.Do not make the rice much soft and spread it and let it cool.Then take a non stick deep pan and add butter in it and toss the cooled rice for 3-4 mins till it nicely gets coated with butter.Garnish with parsley.

Now while serving.Take rice and on top pour generous amount of mushroom sauce and chicken pieces.Serve hot.


NOTE: My vegetarian friends can try this mushroom sauce and buttered rice with some roasted veggy or roasted peppered paneer/tofu.

Shower Of Awards...!!!

Author: Siddhi Shirsat // Category:


I had got lot of awards( can say shower of awards...:-)) from many of my dear bloggers friends so i am posting all the awards now.

THANK YOU award was given to me by Deepa, Nithu and Renuka.

KREATIVE BLOGGER award was given to me by Renuka, Jyoti,Aparna, Swapnashree and Nithu.

SMART FOOD BLOGGER award was given to me by Deepa,Nithu and Renuka.

BLOG LOVING AWARD was given to me by Renuka

LOVELY BLOG AWARD was given to me by Renuka

I LOVE YOU YUMILLICIOUS FOOD BLOG award was given to me by Jyoti.

Thanx a lot Deepa,Renuka,Jyoti,Nithu & Aparna for thinking me capable and sharing with me this wonderful awards.I am very delighted to have them:-)...I present this awards to all my dear blogger friends.

Sakhar Bhath (Sweet Saffron Rice)...!!!

Author: Siddhi Shirsat // Category: , , ,

A VERY HAPPY MAHASHIVRATRI to all my blogger friends...Since its the occasion of mahashivratri i decided to post a very famous sweet dish recipe.Its " Sakhar bhath" means sweet rice.Its consists of sweetened rice flavoured with saffron(Kesar) and dryfruits.Its one of the most common and sweet dish prepared here for any special occasions.Its also very easy to prepare it.I love this dish so i do not need any special occasion to prepare and enjoy it...:-))...There are many different ways to prepare this sakhar bhath ( all methods are almost same, they differ only a little) but i like this method.I learnt it from my mom.So like some of the other recipes in my blog, this is also my moms recipe and i just love it.


INGREDIENTS:

2 cups basmati rice
2 cups sugar
1/2 cup pure ghee(desi ghee)
1/2 cup raisins
10-15 whole cashewnuts
1/2 cup almonds chopped
1/2 cup chopped cashewnuts
few saffron stands(kesar)
pinch of orange colour
1/4 cup milk
5-6 cloves
1 table spoon saffron-elaichi syrup(optional)
1 tea spoon cardamom powder
1/2 tea spoon salt

METHOD:

Wash the basmati rice in water and drain it.Spread it on a muslin cloth to dry for 20-15 mins.Heat little pure ghee in a kadai and fry the whole cashewnuts till golden brown and keep them aside.This fried cashewnuts give a very good taste when served.Soak saffron strands in milk and keep aside.

Now in that same kadai add all the ghee and when it heats up add the cloves.Saute them for 2 mins and then add the dried basmati rice and saute it on medium flame for 4-5 mins.add the chopped cashewnuts, almonds and raisins ans saute for more 1-2 mins.Heat 4-5 cups of water simultaneously.Sauting rice is very important as it results in non sticky sakhar bhath.

When the rice gets sauted well add the hot water in it.Normally twice amount of water is added, but here little more is required, generally 2 n 1/2 times more water but u adjust it accordingly.Add salt and stir it well. Add the pinch of orange colour to the milk and saffron mixture and add to the cooking rice.Give a nice stir and close it.Let the rice get cooked on low flame.When the rice is half cooked you can add kesar-elaichi syrup n stir and continue its cooking.

Check in between if all the water of the rice has got dried, if its dried and rice is not fully cooked then add little more hot water and let the rice get cooked.when the rice is fully cooked then add the sugar and give a stir.Do not stir to much as the rice tends to break.You can add more or less sugar according to your taste, but this is the standard measurement.Do not add sugar before the rice gets fully cooked or else the rice will become hard and sakharbhath wont taste good.

Now after adding sugar the sugar will melt, so let it get cooked on low flame.When the liquified sugar coats the rice and almost dries up add the cardamom powder.Remove it from flame and keep it open for some time.

Garnish with fried cashewnuts and serve.I have used rice mould to give it shape so you cannot see the lose rice granules.Remove the cloves while serving.


NOTE: Use of basmati rice is highyl recommended here as it gives a nice taste and flavour to the rice, but you can even use normal rice.
Using pure ghee/desi ghee gives a nice taste to the whole rice, but if you do not like it you can replace it with normal ghee.


Preparation Time: 25 mins


Vada Kombda( Fried Vadas With Chicken Gravy)...!!!

Author: Siddhi Shirsat // Category: ,

This "Vada Kombda" is a very famous meal combination along the konkan coast of india.It consists of vada which is made by combining different flours and a spicy chicken gravy(" Kombda" means rooster). This combo really tastes very nice.This vada is made by combining different flours into a dough, making a flattened doughnut-shaped disc with the dough and deep-frying it. There are 3 types of vada recipes which i know, all taste very nice but today i am posting recipe of one type of vadas.This are the most simplest of them all but taste is superb.Chicken gravy in the pic is Goan chicken Xacuti/Shakuti which i had posted earlierhere.This vadas with chicken gravy taste superb campared to bread, i know since they are deep fried they contain a lot more calories but once in a while its ok to enjoy them:-))
My vegetarian friends can enjoy this vadas with some spicy vegetable or lentil gravy, i am sure u all will love them.

INGREDIENTS:
  • 2 cups wheat flour
  • 2 cups rice flour
  • 1-2 tea spoon mustard seeds
  • 1-2 tea spoons fenugreek(methi) seeds
  • oil
  • salt

METHOD:

Roast the mustard and fenugreek seeds separately and cool them.Then grind each one of them to a fine powder.Keep it aside.

Take a bowl and add both the flours and mix them.Then add salt,roasted fenugreek and mustard powder and mix it well with the mixture.If u do not like you can skip mustard and fenugreek powder, but it adds a nice taste and flavour to the vadas.

Now heat 2-3 table spoons of oil and add it to the flour mixture.Using hands mix it well for 2-3 mins with the flour so that it coats the whole flour mixture.Then add enough water and kned it well to form a medium firm dough.Cover it and keep for 30 mins.

Take a banana leaf and apply oil all over it, you can even take a plastic sheet. Make small balls of the dough and using ur fingers flatten them into small round disks like puris on the plastic sheet.They can be of around 4-5 inches diameter and 3-4mm thick.

Heat oil in a kadai and deep fry this vadas on medium flame till golden brown.Drain on oil absorbent paper.

Serve hot with Chicken Xacuti/Shaguti or any spicy gravy.


NOTE: Please do not mistaken this vadas as puris, they look similar to puris but they are not...they are much more thicker then puris.

Preparation Time: 20 mins


I am posting this entry to the event Cooking With Seeds-Fenugreek Seedsorganised by SE of Denufood and announced by Priya of Priyas easy and tasty recipes .


Yummy Vegetable Manchurian Rolls...!!!

Author: Siddhi Shirsat // Category: , ,


This vegetable manchurian rolls is a very tasty and filling snack...if ur a manchurian lover you will definetly love them...I love making this snack often as its quick , filling and tasty snack.


INGREDIENTS:
  • 4 long bread rolls
  • 1 1/2 cups Shredded cabbage
  • 1 cup grated carrot
  • 1 cup very finely chopped caulifower florets
  • 1/2 cup chopped spring onion greens
  • 1/2 cup finely chopped onions
  • 1/2 cup + 2 tea spoons cornflour
  • 1/4 cup maida(all purpose flour)
  • 2 table spoons soya sauce
  • 1 table spoon tomato ketchup
  • 1-2 tea spoons green chilli sauce(optional)
  • 1-2 table spoons finely chopped garlic
  • 1-2 table spoons finely chopped ginger
  • 2 tea spoons finely chopped green chillis
  • 1 tea spoon vinegar
  • 1/2 tea spoon sugar
  • salt
  • oil

METHOD:

Take a bowl and add shredded cabbage, grated carrot and finely chopped cauliflower florets.Add salt and 2 tea spoons soya sauce in them and mix it well so that its evenly coated with it.Now add the corn flour and maida in them and bind them well.

You can add more maida and cornflour if required but remember the ratio of quantity added should be 1:2 i.e cornflour should be double of maida.This gives the required crispiness to the balls when fried.Bind the mixture properly and do not add even little water as if water is added the balls will absorb more oil while frying.

Shape them into marbel size firm balls and deep fry them in hot oil till golden brown and crisp.Remove them on absorbing paper and keep aside.

Now to make the sauce heat little oil in a pan and add the chopped onion and saute it till soft then add the chopped ginger, garlic and green chillis and saute for 2 mins. Add the remaining soya sauce , tomato ketchup, vinegar and stir well.Now add salt and sugar and cook for 2 mins.

Mix 2 tea spoon cornflour in 3/4 cup water and mix it well.Add it to the cooking mixture and stir well.Cook till it thickens.You can add little water if required to get the required consistency.Add the spring onion greens and the fried manchurian balls.Close and cook for 3-4 mins.Manchurian is ready.

Slit the bread rolls without cutting through, apply a thick layer of the gravy from the prepared manchurian.Arrange 4-5 balls from the manchurain gravy and close the roll and serve while its hot.

Tastes best when served hot.


TIP: If you have some leftover cooked noodles you can even add them while mixing the manchurian balls mixture.They bind the balls very well and balls become more crispy.


Preparation Time : 35 mins


Repost For APS Rice Event...!!!

Author: Siddhi Shirsat // Category:


Silpa of Anita's Kitchen has organised a event APS -Rice(Annam Parbramha Swaroopam) and i am very delighted to send few of my entries which i had posted earlier by resposting them.This dishes are some of my favourite recipes:-)


Papaya Laddus(Ladoos)...!!!

Author: Siddhi Shirsat // Category:

I had not posted any sweet recipe from past few days so decided to post this papaya laddus which i had made few days back. I know papaya laddus sounds bit uncommon and weird, but they are very tasty and healthy laddus and very easy to prepare too.These laddus are high in nutrition and the best part is that this laddus are prepared without using any ghee or oil.These laddus are very rich in vitamin A as it is present in a very high quantity in papaya.I also like the colour of this laddus, its very attractive.If u have brought a papaya from store which is not at all sweet you can utilise it to make this laddus . Just give a try to this laddus and i am sure u all will love this soft tasty ladoos.These laddus can be stored without refrigeration for upto 5-6 days.

INGREDIENTS:

1 medium sized ripe papaya( which yields approx 2 cups puree)
1/2 cup powdered sugar
3/4 cup desiccated coconut(fine one)
1 table spoon kesar-elaichi syrup( or cardamom powder)
few strands of saffron( kesar)
1/2 cup whole cashew nuts

METHOD:

Cut the ripe papaya in pieces and remove its skin and puree it using a blender.Heat a non-stick pan and add the papaya pulp.Cook it on low flame stirring countinously.

After some time the pulp will become little thick then add powdered sugar and stir well.Amount of sugar added depends on the sweetness of papaya.If papaya is less sweet you can add little more sugar.After adding sugar the mixture will melt.

Keep on stirring and cook till the mixture thickens. When the mixture starts leaving sides of pan add the kesar-elaichi essence, saffron strands and 1/2 cup of desiccated coconut.Mix it well and cook while stirring till the mixture forms a ball.Take little mixture and cool it in hand and roll it between fingers and check it it forms a ball.If it then the mixture is ready.

Remove the mixture from flame and let it cool.Make lemon size balls of it and roll in remaining desiccated coconut powder and garnish by pressing a whole cashew on top.

Store them in air-tight container.

Angoori Paneer Tikka...!!!

Author: Siddhi Shirsat // Category: ,

This is a very tasty starter dish...Tangy black grapes sauce is sandwiched between paneer slices,skewered along with bell pepper and tomato and roasted till golden brown. Its a very good tasty and unique vegetarian starter to serve for a party.Give it a try.

INGREDIENTS:

For Paneer Tikka:
  • 200 grams paneer block(cottage cheese)
  • 1/2 cup green bellpepper diced( 1 inch square pieces)
  • 1/2 cup tomato diced( 1 inch square pieces)
  • 2 tea spoon chat masala
  • 1/4 cup besan(gram flour)
  • 1/4 tea spoon pepper powder
  • 1/4 tea spoon amchur(dry mango powder)
  • 2-3 table spoon milk
  • 2 tea spoon fresh cream(optional)
  • 1/2 tea spoon chilli powder
  • 10- 12 small bamboo skewers( or toothpicks)
  • salt
  • oil

For Grape Sauce:
  • 1 cup chopped fresh black grapes
  • 1 cup finely chopped jaggery
  • 1 table spoon lemon juice
  • black salt
  • salt
  • oil

METHOD:

First to make the grapes sauce heat 1 tea spoon oil in a kadai.Add the chopped black grapes and saute until they become soft .Add black salt and salt and mix.Add the jaggery and let the mixture get cooked.Amount of jaggery depends on the sweetness of grapes, if grapes are very sweet then add little less jaggery.

When the mixture becomes thick add lemon juice and remove from flame.Let it get cooled then grind it to a fine and smooth paste.Keep it aside.

Cut the paneer block into 1/2 centimeter thick slices.sprinkle little salt and chat masala evenly over them.Take one slice and apply grapes sauce all over it on one side.Keep the other slice on top of it and cover.This is paneer sandwich.Now cut this paneer sandwich in 1 inch sided squares.

for the batter take besan in a bowl and add salt, chilli powder, pepper powder and amchur to it mix it well.Then add milk and cream and form a thick batter.

Now take a skewer and thread one bellpepper piece and tomato piece.After it thread one paneer sandwich square and again thread one tomato and bellpepper piece.The tomato and bellpepper pieces holds the paneer firmly on the skewer.Repeat the same with the remaining paneer squares and veges.

Arrange all the threaded skewers on a plate and pour 1-2 tea spoon of prepared besan batter on the paneer square so that it covers the paneer square on all sides.

Heat 2-3 tea spoons of oil in a pan. Place these skewers on the hot pan and cook till golden brown on all sides.

Serve hot with black grape sauce.


Preparation Time: 20 mins


Burmese Khow Suey...!!!

Author: Siddhi Shirsat // Category: ,

Burmese Khow Suey is a one pot meal which is a delicious concoction of noodles, spicy chicken/veges with coconut milk gravy and served with a variety of contrasting condiments and the final touch is a squeeze of lemon which adds the final tanginess. When i saw this recipe i was very much interested to try it out as the recipe was very interesting and when i finally did it we just loved the final outcome.Its just perfect one pot filling meal, specially when the condiments are added to it it tastes awesome.Now its a frequent dish at our place.

INGREDIENTS:
  • 1 cup boneless chicken pieces( i inch pieces)
  • 100 grams of noodles ( egg noodles/plain noodles)
  • 1 medium sized onion chopped finely
  • 1-2 table spoon ginger-garlic paste
  • 7-8 garlic cloves
  • 4-5 long red chillis
  • 1 inch ginger piece
  • 1 big onion chopped roughly
  • 1/2 tea spoon turmeric powder
  • 2-3 table spoon roasted chana dal (bengal gram) course powder
  • 1 cup thick coconut milk
  • salt
  • oil

Condiments While Serving:
  • Fried garlic pieces( fry till golden brown)
  • Fried sliced onion(Fry till golden brown)
  • Chopped boiled eggs(optional)
  • Chopped green chillies in vinegar
  • Lime wedges
  • potato chips/french fries
  • chilli sauce(optional)
  • chopped spring onions(optional)
  • chilli oil(optional)

METHOD:

Apply ginger-garlic paste and little salt to chicken pieces and keep for 30 mins then pressure cook it till it gets cooked.Retain its stock aside after it gets cooked.

Grind together roughly chopped onion,long red chillis,garlic cloves, ginger pieces and turmeric powder to fine red paste.

Heat a pan and add little oil, saute the finely chooped onion till transparent.Then add the ground red paste and saute the paste for 5-6 mins till its raw smell goes.Now add the the cooked chicken pieces and saute more for 2 mins.

Then add the chicken stock which was kept aside of the cooked chicken and close the lid and let it get cooked for 5-6 mins.When its boiling add the salt and stir.Add more water if required.

Then add coconut milk and mix it , lower the flame hile adding it.Mix chana dal powder in little water and add to the cooking gravy and cook till the gravy thickens.

Simultaneously boil 500 ml of water in a vessel and add little salt and 2 tea spoon oil.Cook the noodles in it till they are done.Then drain the hot water and pass running cold water through them.Keep them aside.

Now while serving place a single serve of noodles in a slight deep plate. Top generously with the chicken gravy, then add the fried garlic pieces and fried onions one on top of the other as per preference. The other condiments can be taken according to individual taste. Add a twist of lemon.You can even drizzle a little hot chilli oil .Enjoy...!!!

NOTE: My vegetarians friends can add veges(carrots, baby corn, mushroom etc) and paneer or tofu cubes and enjoy it instead of chicken, rest recipe will remain same.

Preparation Time: 35 mins

Awards...!!!

Author: Siddhi Shirsat // Category:

I had got few awards this days so i am posting all of them together now. This above award was given to me by my sweet blogger friend jagruti of joy of cooking...thnx a lot Jagruti for giving it to me.

This beautiful blogger award was given to me by my dearest blogger friends Sarah of vazhayilla, Dolly from curry n beyond and spice of spicebuds.Thanx a lot sarah, dolly and spice for thinking of me.
I would like to share both the above awards with few of my blogger friends.They are:


And finally this kreative blogger award was given to me by my blogger friends Faiza of Faiza ali's kitchen of and Spice of spice buds.Thanks a lot spice and faiza for selecting me. This award has some rules which are as follows.

Rules for accepting the Kreative Blogger award :

1) Thank the person giving the award
2) Copy the award to your blog
3) Place a link to their blog
4) Name 7 things people don't know about you
5) Nominate 7 bloggers
6) Place a link to those bloggers
7) Leave a comment letting those bloggers know about the award

I would like to share these awards with :

1) Babli of khana Masala
2) Jagruti of Joy Of Cooking
3) Dolly of Curry And Beyond
5) sanjana of Ko Rasoi
6) Pari of Foodelicious
7) Sarah of Vazhayila

Now the list of 7 things people dont know about me

1) I am a very very talkative person, its difficult for me to keep quite for long.I do not need any special topic to start with, if i start with any topic i can stretch it for as long as an hour and people around me do not get bored:-)
2) I can make friends very easily.
3) Apart from learning new dishes i like to update my self with latest technologies, softwares and latest gadgets launched.
4) I just love flowers a lot specially roses and orchids and others also.When ever i see flowers around me i feel very very nice .When i see flowers in stores its difficult for me to resist myself from buying some of them:-)
5) I love to travel a lot and see new places, but i love mostly going to hillstations.I just feel sooooooooo happy when i see those beautiful tall mountains, forests, flowers over there.
6) I love shopping a lot infact i can shop for one whole day without any break.Shopping list can include anything like clothes,books,grocery,show items bla bla
7) I love to read novels also and if i sit to read an interesting novel i wont get up until it gets over or else i feel uneasy:-)

Related Posts with Thumbnails