





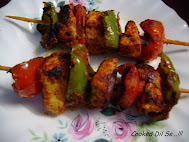


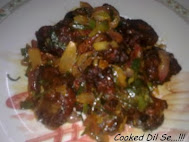
Achari Paneer Tikka...!!!

Author: Siddhi Shirsat // Category: , ,


I am a big fan of tikkas and kebabs and trying them with different flavours is a very interesting task.So i made this "Achari Paneer Tikka" recently by using achar masala(Pickle spice powder) and some regular ingredients.Pickle is a must with food in many regions of India  , so why not use it to make some other tasty dishes.This is a very quick,easy and tasty starter.I added whatever spices i found to make it more spicy but it will get its main taste from the achar/pickle spice powder.You can use any achar/pickle powder for it.I have used a homemade pickle spice powder, but if you do not have homemade achar/pickle powder you can even use readymade pickle spice powder as its very easily available in stores.


INGREDIENTS:

  • 250 grams paneer (cottage cheese)
  • 2 capsicum
  • 2 tomatoes
  • 1 cup yogurt
  • 1 table spoon of homemade/readymade achar masala(Pickle spice powder)
  • 1 tea spoon chilli powder(optional)
  • 1/2 tea spoon turmeric powder
  • 1 tea spoon amchur powder(dry mango powder)
  • 1 tea spoon cumin powder
  • 1/2 tea spoon chat masala
  • 1/2 teaspoon sugar
  • salt
  • oil


METHOD:


Put the yogurt in a muslin cloth and tie a knot.Hung it for 1 hour so that all the water drips down from it.Cut the paneer intoone  inch cubes.Similarly cut capsicum and tomatoes in one inch square pieces.


Take the hung yogurt in a bowl.Add chilli powder, turmeric powder,cumin powder,amchur powder, chat masala and achar/pickle spice powder,sugar and salt  to it.Mix it well so that the spices get distributed evenly.Add the amount of spices according to your taste.Add 2 tea spoon oil also and mix.Marinade is ready.


Now take the paneer cubes and chopped tomato and capsicum pieces in a big bowl.Add the marinade  mixture to it ans mix it well..Apply the marinade gently to the paneer cubes or else they tend to break.


Take some satay/skewer sticks.Take one stick and thread alternate layers of marinated capsicum, paneer cube and tomato.Repeat it with the other sticks.

Heat a tawa/griddle with little oil or a stone griller or tandoor and grill it for 2-3 mins on each side till done.


Serve hot.


Preparation Time: 20 mins

Chinese Fritters(Pakodas)...!!!

Author: Siddhi Shirsat // Category: ,

In this daysits a real treat to have hot pakodas/fritters with a cup of hot masala tea or coffee when its raining heavily outside.But sometimes you get bored with the same taste of pakodas,so i am here with some different type of pakodas.Chinese pakodas.I like chinese food sometimes, so decided to prepare chinese pakodas using all ingredients used for chinese cooking and outcome was superb.Got very cripsy, little spicy and tasty pakodas.I am sure if you all try this chinese fritters, you all will love them.


INGREDIENTS:
  • 11/2 cup shredded cabbage
  • 1/2 cup grated carrot
  • 3/4 cup sliced capsicum(thin long slices)
  • 50 grams hakka noodles
  • 2 table spoon rice flour
  • 2 table spoon besan(cheakpea flour)
  • 1/2 cup cornflour
  • 2 teaspoons  worcestershire sauce ( or soya sauce + chilli sauce)
  • 1 tea spoon chilli flakes
  • 1 table spoon schezwan sauce
  • 2 table spoon roasted sesame seeds
  • 2 tea spoon tomato ketchup
  • 1 tea spoon sugar
  • salt
  • oil

METHOD:


Heat water in a utensil and when it starts boiling add salt and 1 tea spoon oil.Then add the noodles and  cook till done.Drain thee water and keep them under running cold water.Let them cool.


Take a bowl and take all the sliced vegetables in it.Mix them well and then add worcestershire sauce,chilli flakes, schezwan sauce, sugar, salt, tomato ketchup and mix it well so that all the veges get coated well with the sauces.


Then add rice flour and besan and mix it well again.Add boiled noodles and mix them well with the mix.Noodles help to bind the mixture well as well they give a good taste.Now when the mixture is evenly mixed add the cornflour.Add the cornflour just to get a perfect binding means proper firm balls must be made of the mixture. You can increase or decrease the amount of cornflour added.


Heat oil and make put 1 table spoon of mixture at a time to form small fritters.Fry them till little golden brown and crispy.


Serve them hot with tomato sweet-chilli sauce.


Preparation Time: 20 mins

Creamy Mushroom Soup...!!!

Author: Siddhi Shirsat // Category: ,


Hi my dear friends...hope u all r doing well...i was not able to post from last many days, but now i will try to be regular...Rainy season has started here in Goa and its been raining heavily from past couple of days here, so what can be better than a hot soup on a cold rainy evening.I have made this mushroom soup using very few and easily available ingredients...Enjoy this hot tasty soup in this rainy days.


INGREDIENTS:
  • 2 cups sliced button mushrooms
  • 2 sliced onions
  • 1 tea spoon fresh grated ginger
  • 1/2 cup milk
  • 2-3 tea spoon cornflour
  • 2 table spoons of butter
  • 4-5 cups vegetable/chicken stalk(or 1 vegetable seasoning powder cube)
  • 1 tea spoon fresh pepper powder
  • salt
  • parsley(optional)
  • grated cheese(optional)


METHOD:

Heat a pan and add little butter, then saute the sliced onions on it till soft and then add 1n1/2 cups of sliced mushrooms and ginger and saute till they become soft and onion becomes brown.Add cornflour to the milk and stir it.Add this paste to the sauted onions and mushrooms and cook for 3-4 mins stiring countinously.

Let this mixture get cooled.Then grind it to a fine paste.Add vegetable/chicken stalk to it and mix it.Cook it on a medium flame for few mins.Add salt and pepper powder according to your taste.Cook till this mixture gets boiled and gets the required soup consistency.

Heat the remaining butter in a pan.Shallow fry the remaining sliced mushrooms till brown and crisp on both sides.

When the soup is ready garnish it with parsley, grated cheese and crisp fried mushrooms.Serve hot.

Preparation Time : 15 mins

NOTE: If vegetable stalk is not available, add the vegetable seasoning cube powder to water and cook it for 3-4 mins and then use it as stalk.


First Blog Anniversary With Chocolate Ganache Cake(Eggless)...!!!

Author: Siddhi Shirsat // Category: ,


Hello my dear blogger friends....My blog turns out one today so i am very happy....One year went so fast, in this time i got many new friends cause of it and got to learn many new things also.So on this happy occasion i have a special chocolate ganche cake for you all.I am not a cake expert and i am very new to icing cakes so i have made this cake very simple.I had made this cake few weeks back and had not got time to  post it , but now happy as got a better chance to post it....I am not a expert in cake icing, m just in the begining phase so did what ever  felt for this cake.I had some special kids as my guests so wanted to make something chocolaty, so made this cake.I had just 2 hours to make it.I made the cake and it took time to get cooled so i had just 15 mins for the icing so did whatever i felt.I first gave a layer of vanilla butter cream icing at its sides and then poured hot ganche over it.Had not time to cool the ganache fully so it dripped down till the end of of the edge or else it had to be on half of the edge only.I mostly prefer eggless cake and loved this cake.The basic sponge had turned out very soft and with ganache it tasted superb.


INGREDIENTS:

For The Rich Eggless Chocolate sponge
  • 200 gms condensed milk
  • 1/2 cup milk
  • 1 cup(100 gms) maida(flour)
  • 1/4 cup powdered sugar
  • 1/4 cup cocoa powder
  • 1/2 cup(75 gms) oil
  • 1 tea spoon baking powder
  • 1/2 tea spoon baking soda
  • 1 tea spoon vanilla essence

METHOD:

I had followed this  main chocolate sponge recipe from nita mehtas cakes and cookies and it turned out really soft and tasty.Sieve flour, baking powder and baking soda together.keep it aside.In a big bowl beat oil, sugar, essence till well mixed. Add cocoa powder and beat again.Add milk and condensed milk and again beat well.Sometimes the mixture tends to curdle up so that time beat it over hot water.

Now add flour in two-three batches, mixing well after each addition.Beat for 4-5 mins till mixture is light and fluffy and of soft dropping consistency.Can add more milk to adjust its consistency.

grease a 6 inch round tin and preheat the oven to 150 degrees.Pout this batter in this greased tin and bake at 150 degrees for 55-60 mins.Insert knife and check if it comes out clean.After 5-10 mins invert it on wire rack and cool.Below i have put a pic of baked chocolate sponge.
    

CAKE ICING

For Vanila Butter-Cream Icing:

Ingredients:
  • 1/2 cup butter(at room temp)
  • 2 table  spoon clarified ghee
  • 2 table spoon low fat fresh cream
  • 3-4 table spoon powdered sugar
  • 3-4 table spoon icing sugar
  • 1 tea spoon vanila essence
Method:
First cut the cake in the center to form to round slices.Whip all ingredients in the frosting until thick and frosting holds peaks.Apply a layer of butter cream icing on the lower half of the cake and close the other half on top of it.Apply the remaining butter-cream frosting on the side of the cake using a spatulla.Level it to form a uniform layer.Refrigerate it for 20 mins.

For Ganache:
  • 150 grams dark cooking chocolate cut in small pieces
  • 100grams fresh cream( i used amul low fat cream)


For Other Icing:
  • Glazed cherries
  • cashewnut cut in thin shivers or grated white chocolate
  • dark chocolate shaving

Method:

Heat cream using water bath and then when it just starts boiling add the chocolate pieces and let them melt fully.Mix nicely to remove all lumps.Let it cool for 10 mins.

Remove the cake from refrigerator.Apply little ganache on top.This layer is important as it helps to make the top layer smooth.Spread it nicely on top, do not allow it to drip down now.Refrigerate it for 10 mins.Pic of this stage i have shown below.

Then remove the cake out and pour the ganache generously on the top of the cake.Let it flow down the vanilla-buttercream icing naturally to form a beautiful pattern.It should a smooth layer on top.


Refrigerate it for 10 more mins and then sprinkle thin slices of cashewnuts along its border and then decorate it with remaining vanila buttercream icing , galzed cherries and chocolate shavings.

        
Enjoy the cake...


Preparation Time : 3 hours

Kokum Tender Coconut Ice-Cream...!!!

Author: Siddhi Shirsat // Category: ,

Well i have not be able to post from quite some days now...I am soo busy that i even miss my regular blog hopping...but i will try to be on track now...So how r you all?...Summer is still in its peak so i am back with a ice-cream to beat the summer heat....but this time i have made this ice-cream combining some different flavours...Tender coconut ice-cream is very famous..so i made ice-cream using tender coconut and also added little kokum extract(A very famous syrup in western india made from a fruit used for making drinks and also some other dishes specially along the konkan sea coast ) to it to enhance its taste and flavour.Kokum is also a natural body cooling agent like khus,cumin etc, for more details you can refer here.This ice -cream was a very tasty and unique one...tender coconut gave it a sweet and juicy taste and kokum syrup gave little sour taste and a nice flavour along with a little pink tint too.


INGREDIENTS:


1 litre whole milk
1 n 1/4 cup sugar
1 cup tender coconut flesh cut n small pieces
2 table spoon dessicated coconut
2 table spoon kokum extract(or kokum syrup)
1/2 cup fresh cream
2 tea spoon corn flour


METHOD:


Boil the  milk and then reduce the flame and cook it till it gets reduced to half.Cook on low flame with stirring countinously till it reduces to 500ml. Then add sugar and stir it.After 2 mins add dessicated coconut and mix it well in it.


Mix 2 tea spoon cornflour in 3 table spoon milk and add to the above mixture.Stir and cook till it gets thicker.Cool this mixture for one hour.Add kokum extract and fresh cream and blend it in a hand blender for 2 mins.Finally add tender coconut flesh pieces and mix it well.


Put it in a mould and freeze for 6-7 hours.Remove scoops and serve it.You can even drizzle some kokum syrup and serve it.


Preparation Time: 8 hours

Array Of Summer Coolers...!!!

Author: Siddhi Shirsat // Category: ,

Summer has reached its peak so i am posting some refreshing and cooling mocktails and shakes which are made by combining different flavours.


GREEN LADY


A very refreshing and eyecatChing mocktail made by using khus syrup and lemonade gives a very refreshing and cooling effect in summer.


Ingredients:
500 ml lemonade
2-3 table spoons of khus syrup
2 table spoon lemon juice
pinch of salt
ice cubes
sugar(optional)


Method:
Mix together khus syrup, salt and lemon juice. Add crushed ice and lemonade and mix.Pour in two glasses and add ice cubes and serve immediately.


MANGO SHAKE


Well how can i miss the very famous mango shake in season of mangoes.This is a very simple yet refreshing shake.


Ingredients:


1 ripe mango( or 1 cup canned mango pulp)
300 ml chilled milk
sugar
cardomom powder
ice cubes(optional)


Method:
If using ripe mango, puree it.I use Goan special breed of mango called "mankurad" which is very famous in Goa
Mix everthing in a blend and blend to a smooth shake.Add more milk if its too thick.Serve chilled.


LAVA FLOW
                               
                    
A delightful and filling mocktail with strawberries, bananas, pineapple, and coconut milk.Its a very unusuall combo , but taste is really good.

Ingredients:

1 medium ripe banana mashed
1/2 cup strawberry crush
200ml coconut milk
2 tablespoon fresh cream
200 ml fresh pineapple juice
2 table spoon chopped fresh pineapple
few fresh mint leaves
canned cherries
crushed ice

Method:

Take the banana pieces, strawberry crush in a blender.Add coconut milk and blend till smooth. Add pineapple cubes to the banana mixture, keeping a few aside for garnish and blend again.Add fresh cream and pineapple juice and ice. Blend further. Crush few leaves of mint and add to the mixture. Pour into glasses. 
Serve chilled.


KOKUM PINEAPPLE PUNCH


This refreshing mocktail with a little Goan touch  by using kokum syrup and spiced with ginger and cumin along with coconut water is a very  colling and refreshing one.


Ingredients:


100 ml tender coconut water
150 ml pineapple juice
2 table spoon kokum syrup
2 tea spoon ginger juice
2 table spoon lemon juice
1 tea spoon roasted cumin powder
few pieces of pineapple
powdered sugar(optional)


METHOD:


Take tender coconut water in a bowl.. Add lemon juice, ginger juice, cumin powder, pineapple juice and mix it well.Then add kokum syrup and pineapple pieces and mix it.Add powdered sugar is required.Chill it and serve.

Mushroom Lollypop's...!!!

Author: Siddhi Shirsat // Category: ,


I am not geting enough time for blogging this days as i am bit busy nowdays, so was not able to post from last few days and even missed my regular blog hopping .But today i am back with a very tasty starter "Mushroom Lollypop".This is one of the most yummy and tasty starter in my vegetarian starters list.I found a very good recipe of it in sushmas blog here.She has given a very nice recipe of it and her pic is also very inviting.Do check her blog for many yummy chinese as well as other recipes.Thanx A lot Sushma for the lovely post.I tried her version and they were so tasty that they got over in few mins Try them soon and i am very sure that you all will love it.Its are perfect starter for some special guests at home.


INGREDIENTS:

  • 200 grams fresh button mushrooms
  • 1 cup coursly grinded cornflakes
  • oil

For Marinade:

  • 1 tea spoon pepper powder
  • 2 tea spoon fresh garlic paste
  • 2 tea spoon lemon juice

For Batter:

  • 1/2 cup maida(All purpose flour)
  • 1/2 cup cornflour
  • 2 tea spoon fresh garlic paste
  • 1 table spoon grated mozzarella cheese
  • 2-3 green chillis finely chopped
  • 2 table spoon finely chopped coriander leaves
  • 1/2 tea spoon baking powder
  • salt

While Serving:

  • Toothpicks
  • Silver foil


METHOD:


Wash the mushrooms well and then dry them fully by keeping them on a absorbant paper for few mins.Prick them with a fork at few places so that they absorb the marinade well.Mix all the ingredients of the marinade in a bowl and rub it all over the mushrooms very well.Keep them aside for 30-40 mins.


Mix all the ingredients of the batter and make a smooth and thick batter like that of a pakoda . Spread the crushed cornflakes on a plate.Now take each marinated mushroom and dip it well in the prepared batter and then roll it on a bed of crushed cornflakes so that it coats it well all over.Deep fry this mushrooms in hot oil till golden brown.


You can prick them with a toothpick before deeping in the batter or you can even prick it after frying the mushrooms as sometimes the toothpick tends to fall during frying.Then wrap the ends of toothpick with a silver foil and serve them hot.


I served them with oriental chilli-garlic sauce as it goes very well with it...


Preparation Time:50 mins

Mutter Paneer(Peas With Cottage Cheese)...!!!

Author: Siddhi Shirsat // Category: ,


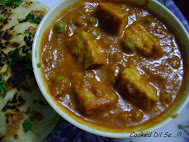
Mutter Paneer is one of the most famous gravy dish in north indian paneer gravies....nothing much to say about this dish as its known by most of you.You can make this dish by making slight changes according to your taste.Its basic ingredients are tomato and onion puree and spices can be adjusted to your choice.I had tried making a little different version of mutter paneer from my regular version and it turned out very good , so i am posting it here today.I had serve it with butter-garlic naans whose recipe i will be posting soon.I am very busy this days so i not able to do blog hopping , so sll good stuff is being missed by me.Some of my blogger friends had given lot of awards from past few weeks and i was not able to post them.Sorry for that and thanx a lot for presenting them to me.


INGREDIENTS:
  • 250 grams paneer(cottage cheese)
  • 11/4 cup fresh green peas(or frozen)
  • 2 onions
  • 2 tomatoes
  • 1/2 cup cashewnuts
  • 1 cup milk
  • 4 kashmiri dry red chillis
  • 1 tea spoon poppy seeds
  • 4 cloves
  • 4 pepper corns
  • 1" cinnamon stick
  • 7-8 garlic cloves
  • 1" ginger piece
  • 1/2 tea spoon turmeric powder
  • 1 bay leaf
  • 1 tea spoon chilli powder(optional)
  • 1/2 tea spoon cumin powder
  • 1 tea spoon corainder powder
  • 1/2  tea spoon garam masala
  • 1/2 tea spoon amchur(dry mango powder)
  • butter
  • ghee
  • salt
  • oil


METHOD:

Soak cashew nuts, cloves, cinnamon, pepper corns and poppy seeds in 1/2 cup water for 2 hours.Then grind it with 2 raw onions, garlic cloves and ginger to a smooth paste using the water used for soaking the spices.

Blanch tomatoes in hot boiling water along with kashmiri red chills for 5-8 mins and then peel tomatoes and remove seeds and blend them into a smooth puree along with red chillis.Saute green peas in butter for 4-5 mins and keep aside.Cut the paneer in 1 inch cubes.

Heat 1 tea spoon ghee and 2 tea spoon oil in a pan and add bay leaf and after one min add the onion and spice paste.Saute it for 5-6 mins till the raw smell goes off.Then add tomato -chilli puree and cook for 2 more mins.Then add turmeric powder,salt, cumin powder, chilli powder,corainder powder and amchur powder and stir well.Then add sauted green peas and cook for 2 mins.Add milk and stir well.If gravy is very thick you can adjust the consistency by adding more milk or little water.

Add sugar and garam masala and mix well.Add diced panner cubes and close and cook for 4-5 mins.You can even saute the panner in butter before using or you can deep fry them.I have used them directly.Checkand adjust  the spices  if necessary and remove from flame.

Serve it hot with Naan or paratha.I served them with Butter Garlic Naan which i will post soon.

Preparation Time:  30 mins


Kesari Angoori Rabri...!!!

Author: Siddhi Shirsat // Category: ,


This "Angoori Rabri"  is a famous sweet from north india. It consists of puffed up paneer balls immersed in rabri, this balls are called "Angoors' which means grapes in hindi.This paneer balls are as small as grapes so i guess they are called angoors  .Though this sweet is very similar to bengali rasmalai, i have no idea in which state of north india did this sweet originate.I had it for the first time in Amritsar, where i had gone for a college tour with my friends couple of years back.Amritsar is a superb city,we loved staying there and i would love to go there anytime.In Amritsar my visit to the Golden Temple was the most memorable one...its one of the most beautiful temple , where you will feel very peaceful and you wont feel like leaving the place...i had a similar experience .Well now coming back to where i had my first encounter with this kewl dessert.I and few of my friends were just having a walk at night after our dinner in one of the city lanes of Amritsar, as we had loved the place and we came across a famous sweet shop there, my friends wanted to have some dessert so we went there.I was not in mood of having any dessert, but my friends forced me to take it as they said its very tasty.Good that they forced me or else i would miss one of the best desserts .I had loved this concept of angoori rabri, and as per my habit of experimenting i decided to give it a self try soon.So when i was back home i  made it  for my parents and they liked it a lot and it grabbed the topmost position inthe  list of desserts at my place.Its perfect dessert to serve some special guest after dinner instead of our regular desserts for a change.I made it exactly similar to what we had it there, so i used a bit of food colour to make the balls look orange. If u like rasgullas or rasmalai or rabri then go ahead and try this surely.


INGREDIENTS:
  • 1 cup fresh chenna(Fresh soft paneer/cottage cheese)
  • 1 n 1/2 litre whole milk
  • 1 1/2 cup sugar
  • 1/2 cup sliced dryfruits( cashewnuts,almonds,pista and charoli nuts)
  • few saffron strands
  • 2 tea spoon kesar-elaichi syrup(saffron-cardamom syrup)
  • pinch of orange food colour(optional)


METHOD:


Take the fresh chenna and kned it well for some time.Then mix little orange colour in it and kned it again.Now make small smooth and firm round balls of it and keep.Take 3 cups of water in a vessel and add 1/2 cup sugar to it and heat it till the mixture starts boiling.Keep high flame and add the chenna balls one by one slowly.Sprinkle some cold water and close the lid partially.Cook it similar to rasgullas.You can cheack for  more details here.Cook them for 15 mins and then let them cool in the syrup,angoors are ready.


Soak the saffron stands in 2 table spoon milk for 30 mins.Now take a thick bottomed vessel and boil the milk in it.When it starts boiling reduce the flame and keep on stirring till the milk reduces to almost half.If the cream gets sticked to the sides remove it with the help of ladder and mix with cooking milk.When the milk is reduced to half add sugar and saffron milk.Adjust sugar to your taste.Stir it and cook till it reduces to almost 40%.Milk will take almost 50 mins to reduce to such consistency.Now add the kesar-elaichi syrup and dry fruits and remove from flame.Rabri is ready.


Let the rabri get cooled.Now take the cooled angoors and press each of it gently  and remove all the sugar syrup from them.Then put them in rabri and garnish with remaining dryfruits.Refrigerate this rabri with angoors for atleast 2 hours before serving and then serve it.


Tastes best when served chilled.


Preparation Time: 1 hour.


NOTE: To  make chenna, boil milk and then add vinegar or lemon juice to it and countinue boiling it.When the milk will get fully curdled, strain it and keep it tied in muslin cloth so that all the water is drained out.


I am sending this to Jagrutis event Joyful Eating Whilst Traveling.As there is a rule for the participation of the event that a pic must be posted of the visited place where i had this dish, so i am posting a pic of the famous Golden Temple of Amritsar.We had visited it early foggy morning in the month of jan when the temp over there was almost 2 deg, so the pic is not that clear.


Shahi Chicken Dum Biryani...!!!

Author: Siddhi Shirsat // Category: ,

I like to try different types of biryanis.Its really fun to play with different flavours and its very nice when the outcome is very aromatic and tasty...Chicken biryani is one of my favourite dishes...i have made many versions of it and i had posted one quick version of it long back over here...this is one more new version which i hade made and it was liked by all.I had not followed any specific authentic biryani mthod for it or any signature recipe for it but just added and followed what my instinct told me and outcome was a real tasty and aromatic biryani...This was liked by all whom i had served,since then this version is made atleast once in fortnight at my place.I know the preparation process is very long and is very time consuming but believe me, final results are very good, so its really a worth trying one.Both the pics added here contains the same biryani but i had clicked them using different light effects since in first pic chicken pieces are not visible clearly so i have added the second pic with different light effect so that pieces are visible.


INGREDIENTS:


Main Ingredients:
  • 500 grams chicken pieces( preferably boneless)
  • 250 grams basmati rice
  • 2-3 onions chopped
  • 4 bay leaves
  • 2 -3 cloves
  • 2 pepper corns
  • 1" cinnamon stick
  • 1 cup chopped fresh coriander leaves
  • 1 cup chopped fresh pudina leaves(mint leaves)
  • 2 cups sliced onions
  • 1/2 cup cashewnuts
  • 1/2 cup milk
  • few saffron strands
  • 1 tea spoon sugar
  • 2 tea spoon lemon juice
  • ghee
  • oil
  • salt

Marination Ingredients:
  • 2 table spoon lemon juice
  • 1 tea spoon turmeric
  • 1 cup thick curd
Green Marination Paste:
  • 1 cup corainder leaves
  • 1/2 cup pudina leaves
  • 4 green chillis
  • 15-20 garlic cloves
  • 2" ginger
Red Marination Paste:
  • 2 onions chopped
  • 6 black peppers
  • 5 cloves
  • 1" cinamon
  • 4 green cardomom
  • 2 black cardomom
  • 1 tea spoon jeera
  • 1 tea spoon shahi jeera
  • 1 tea spoon fennel(badishep)
  • 1/2 tea spoon carom seeds(owa/ajwain)
  •  2-3 tea spoon chilli powder 
  • 1 tea spoon turmeric powder
  • 1 tea spoon oil


METHOD:


First to make the  green marination paste by grinding all the ingredients mentioned under green paste finely using very little water.To make the red marination paste soak all the whole spices mentioned in its ingredients in 1/2 cup water for 2-3 hours.Saute the chopped two onions in little oil till brown and let them cool.Then grind this fried onions with all the soaked whole spices using the water used for soaking them to a fine paste.Then add chilli powder and turmeric to it and grind again for few seconds, red marination paste is ready.


Apply lemon juice and turmeric powder to the chicken pieces.Then apply prepared  green paste over it.Mix well prepared red marination paste in 1 cup of curd and apply to the chicken pieces.Keep it for marination for 3-4 hours.Atleast keeping for min 2 hours is necessary.Best if kept in refrigerator for marination .


Now fry the sliced onion in oil/ghee till golden and crispy.Also fry the cashew nuts in ghee till brown.Keep them aside for later use.


Now heat a pan and add little oil.Add 2 bay leaves to it and saute for 2 mins.Then add the two chopped onions and saute till they turn light brown.Now add the marinated chicken and saute it for 3-4 mins,then close and let it get cooked in medium flame.When chicken is fully cooked add salt and sugar and stir it.If gravy is to much watery reduce it to a thick paste.It should be like a paste but gravy should be there.


Meanwhile soak the rice in water and drain it.Apply 2 tea spoon oil to it  and keep it aside for 20 mins.Heat little ghee in a thick bottomed vessel.Add 2 cloves,2 pepper corns, 1" cinnamon stick and 2 bay leaves and  saute it for 2 mins.Now add the soaked rice and saute it for 3-4 mins.Add little less water then double quantity of rice for eg if rice is 2 cups add 3 1/2 cups water.Add salt and sprinkle lemon juice.when the water boils close it and let the rice get cooked on low medium flame.It should be 3/4 cooked not fully.Use of ghee and lemon juice makes the rice grains loose and non sticky.


Now when both chicken gravy and rice is read final dum has to be given to it.Soak saffron strands in milk for 30 mins.Take a thick bottomed vessel,heat it a little and remove from flame.Add 1 table spoon of ghee to it.When the ghee melts put a layer of 1/3 of cooked rice.Over it spread a layer of 1/2 cooked chicken gravy evenly.Then sprinkle 1/4 cup each of chopped corainder and pudina leaves.Over it spinkle little of crisp fried onion and few cashewnuts.On top of it again put a layer of cooked rice, then top it again with remaining chicken gravy,1/4 each of chopped corainder and pudina leaves and fried onion and cashewnuts.Now the final top layer must be the remaining rice.Spinkle all the remaining chopped corainder leaves and pudina leaves.Over them sprinkle all the remaining crisp fried onion and cashewnuts.Finally sprinkle the saffron milk evenly over it.


Close the lid.You can seal the edges with a dough or you can keep some weight on top of lid so that it gets closed tightly.Heat a iron griddle on gas.When it gets heated well keep this vessel with the chicken-rice layers on it.Let it get cooked on medium low flame for 20 mins.


When 20 mins are over, do not open it soon.Give it a standing time of 20 mins and then serve this hot biryani.You can serve it immediately also but the standing time increases its taste.


This version of biryani does not require any gravy while serving as by itself its little moist.Just serve it hot with a lemon wedge.


NOTE: You can prepare and keep the marination pastes both green as well as red well in advance and keep.They remain good in freezer for atleast 10 days.


Vegetarians can use paneer or veges in this biryani.Marinate the veges same like chicken but keep them for marination for not more them 1 hour.

Related Posts with Thumbnails